Tuesday 10 September 2013

Our New Blog

Hi there everyone!

Those of you who have been following us on Facebook will already be aware that this blog has been hacked and I no longer have access to it through any other device than my phone. Unfortunate as this is I've decided to take this opportunity to start heading in a fresh direction, as things on the Bean front are changing and I'd like a new space to write about our journey. I will still be focusing on play based learning activities and natural parenting, and now also chronicling our journey into starting our own family day care along with my husband (and Bean, of course!). Its called The Bean Patch and I hope you'll join us over there:

 http://thebeanpatchfdc.blogspot.com.au/

I can't wait to share all our adventures with all our new little beans, and I hope you'll enjoy them too :-)

Happy playing! 

Over and out...

B xx


Friday 29 March 2013

Glowing Egg Hunt!

Another Easter post just in time! Unfortunately I've been slowed down by my health this week so didn't get to put this up this sooner. However, this is really something that's fun for any time of year and particularly now we're heading into shorter days (here in the southern hemisphere) there's more opportunities for little ones to play after dark!

I got the idea for this alternative egg hunt from this post over at Play At Home Mom, and i'd been waiting a year for Bean to be old enough to try it! It's a fantastic alternative to a chocolate egg hunt for those concerned about the Easter sugar overload, and it's also great sensory play for little ones.

All it requires is:

  • Plastic eggs (Available at dollar stores and supermarkets this time of year)
  • LED lights (Available on ebay here and at Big W)
  • A bucket or basket (From the sandpit!)


They don't look all that exciting before the lights go on but then....


...TAADAAAA! :-D So beautiful.


And the LED lights are super easy to do, you just take one out of the packet, twist to turn it on, and pop it into an egg...


...easy! Now to hide the eggs...


I chose to confine the hunt to one room so that i would have the time to set it up without being interrupted!


And since Bean is still very little and it was pretty late, I chose easy spots to hide the eggs...


Turn out the lights and let the hunt begin!


I didn't get many photos as it was so dark and I really just wanted to focus on guiding Bean through it, but I can tell you it was definitely worth the wait!

Happy Playing!

B xx


Easter Sensory Box

I'm finally getting round to posting this one after a very slow week - but just in time for Easter! We actually did this about a week ago and its still being played with now, although its layout has changed somewhat.

This sensory box was very quickly thrown together one day, as most of them are! Largely from items I already had in the cupboard and a few I'd bought a while back in anticipation of doing some kind of Easter themed play. The items included are:

  • Furry Bunny Ears (Dollar Store)
  • Paper Straw (Already had - available at craft stores)
  • Plastic Eggs (Already had - available at dollar stores and Safeway)
  • Easter Chicks (Dollar Store)
  • Rainbow rice (Already had - home made)


And inside the eggs...


...Chicks!


Some big some small, and all different colours...


...Which Bean LOVED.


There was much excitement in opening each egg, discovering the chicks, and naming the colours...


...lining them up and counting how many...


...feeding them the rice and then pretending to be a chick and eating the rice as well :-)


Then the rice got poured into various containers I had put out with the invitation, and in the end when just the rice was left in the box she starting pouring and mixing in water as well.


Of course not forgetting the bunny ears - which inspired some pretend bunny play...


Priceless!

Happy playing and happy Easter to you all!

B xx

Tuesday 19 March 2013

Butterfly Puppets

This was one of those activities that wasn't intended to start or end in us "making" anything in particular. It simply began with my desire to try out salad spinner painting with Bean, which is something i'd been familiar with for a while but had been saving for when she had the dexterity to work the spinner alone. For those of you who haven't tried it yet, it's both incredibly simple and super fun to do (two prerequisites for all activities at our house!). All you need is:
  • Salad spinner (I got ours at a dollar store)
  • Poster paint
  • Paper cut into a size that will fit into the bottom of the spinner
I cut the paper into butterflies and diamonds, simply because they were the first shapes that came to mind when i was folding the paper in half!


Place a paper shape in the bottom of the spinner and then add a few colors of paint...


...This was our first attempt and we placed each colour separately, which after being spun turned out like this...


...I was disappointed that the colours hadn't mixed at all during the spinning, so then we tried adding the paint in swirls one colour on top of another, which turned out like this...


...and this...


...Much more what I had in mind! ;-)
The finished batch looked really beautiful and was put to dry overnight. This brings me to another important point about the paint addition...don't add too much! Otherwise it will sit on the surface after spinning, soak through the paper and/or take FOREVER to dry.


I was really happy with the way they turned out, and Bean had a great time using the salad spinner, but I didn't really want the process to end there. Then came a flash of inspiration! (don't you love it when that happens??)


Puppets! We would make the butterflies into puppets! So I gathered some supplies from the craft boxes - drinking straws for the bodies, pipe cleaners for the antenna, and sellotape to secure.


Bean LOVED it. She helped select which bodies and antenna went with which wings...


...and spent ages putting the pipe cleaners in and out of the straws (great threading and co-ordination practice!) which required some extreme concentration...


I twisted the two pipe cleaners together to fit into the straw and then taped the straw to the wings leaving more straw length at the bottom so that it could be held as a puppet.


The wings flapped beautifully, and Bean proceeded to do a butterfly dance...


"Flutter Flutter!" "Flap Flap!"


This activity evolved into something completely unexpected, and so much better than my original plan. Sometimes all we need is an open heart and a little inspiration to find our wings and fly...

Happy Playing!

Bxx


Saturday 16 March 2013

Creating A Small World - Under The Sea

It was probably 8 months ago when I was reading this post written by a friend of mine on play sets. Now, this was the first time I'd ever heard of them but I was immediately inspired by the creativity and imagination involved in putting them together. For those of you who are new to play sets too, the basic idea to create a scene or 'small world' to facilitate imaginative play and story telling. Sets range vastly from amazingly elaborate to small and minimalist, some use all natural materials like felt and wood, others are put together from found items around the home, whilst some use a mixture of natural and man made products. I went online and drooled over some of the ones for sale on Facebook and Etsy, I even splurged on one (very prematurely!) for Bean's second birthday - which is still up in the closet patiently awaiting its grand debut! But i'm artistic by nature, and so I was also motivated by the challenge of creating something myself. Of course back then Bean was still a little young for the whole idea, so I squirreled the plan away in my mind for a time when she was more ready for this type of imaginative play. And about 3 weeks ago I realized the time had come! :-D

I'm very excited, and also quite proud, to unveil my first play set making attempt - " Under The Sea"


I was surprised at how quick it was to put together, the part that took the most time was sourcing the various components.

The items included in this set are:

Blue satin fabric (Which I already had from my sewing days)
A large rock (From the garden)
Some smaller rocks (From the local park)
Pebbles (Already had from the dollar store)
Glass pebbles (Already had from the dollar store)
Shells (From my vast collection from various beaches)
Plastic sea animals (Ebay)
Aquarium Plants (Ebay)

Because I already had most of the items around the house or in storage the total cost was very low, less than $20.


Needless to say - Bean LOVES it! Waking up most mornings saying "Sea! Sea!"


Happy girl, happy mama ;-)

I'll definitely be making more of these!

B xx


Monday 11 March 2013

The Boobie Book

For a while now i've been struggling to find useful strategies on how to approach parent-led weaning in a gentle and respectful way. So when I came across this idea of making a book about weaning I just loved the notion of having a concrete tool that could potentially help explain to Bean what was happening in a way that she would relate to and enjoy.

The book is basically a story that you make up about your child and their journey towards weaning, using photographs of your child and family as the illustrations. In putting the book and the story together I kept referring to it as 'The Boobie Book' (Bean's word for Breastfeeding) and so that's what it became. I wrote the wording first, which took time to get right as I wanted to make as accessible as possible for Bean as well as fun to read and relevant to the topic - just a bit of pressure there! Then I went through the archives of our photos since Bean was born (needless to say there were more photos taken in the last 23 months than in any of the other 27 years of my life!), selected the best shots to fit the wording, and worked some special favorites in to the story. One trip to Big W to purchase a photo album book and get the prints done, add some late nights cutting and double sided taping the words in place...and voila! The finished article!


And it goes like this...

Once upon a time there was a very special girl born into the world…

Her name was Ava.

From the very beginning she LOVED drinking milk from Mummy’s boobies! - It was SO yummy!

And she LOVED having cuddles, sometimes with mummy…

And sometimes with daddy.

As Ava grew bigger she learned to do LOTS of new things. She learned how to roll over…

She learned to sit up…

She learned to eat food…

And to drink from a cup…


And she still had lots of yummy milk from mummy’s boobies…

And lots of cuddles!

As Ava grew up she learned to do more new things and she said bye bye to some old things. First she learned to stand up, so she said bye bye to sitting…

She learned to crawl, so she said bye bye to standing…

She learned to walk, so she said bye bye to crawling…

And then she learned to run! So she said bye bye to walking.


And she still had lots of yummy milk from mummy’s boobies…

And lots of cuddles!

Ava had so many exciting adventures…

She rode on a carousel horsey…

She went sliding down big slides!

She made new friends…

She played with a wall of water…

And still she had lots of milk from mummy’s boobies…

And lots of cuddles!

She went up and down, up and down on the seesaw…

She explored the wombat park…


She went for walks high up on Daddy’s shoulders…

And still she had lots of milk from mummy’s boobies, and lots of cuddles.

Then one day it was time for Ava to say bye bye to milk…

And bye bye to boobies…

But she still had lots and lots of cuddles, sometimes with mummy…

And sometimes with daddy…

And she and mummy and daddy lived happily ever after. THE END.


So there you have it. Fingers crossed Bean enjoys reading it as much as I enjoyed making it - which I must say was a very therapeutic process in itself. And as well as hopefully being a practical tool in our weaning journey, I also hope to preserve this book as a keepsake for both myself and Bean to look back on this blissful (and boobie-full) time in her life. When all is said and done, I will miss it so.

B xx

Sunday 10 March 2013

Discovery Box - Easter

I got the original idea for this discovery box here, and it's the first of a few Easter themed activities I have planned for this year :-)

If you aren't familiar with the discovery box concept read my first post about it here.

The items included in this box were:

  • Plastic easter eggs - the kind that open up (Doller store or ebay less than $5)
  • Easter bunny and chick cabochons (Found on ebay for $5)
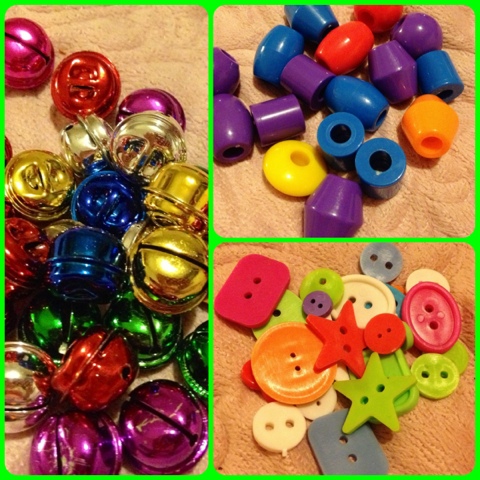
  • Coloured bells (Craft store $3)
  • Big coloured beads (Craft store $3)
  • Coloured plastic buttons (Doller store $2)
  • Pony beads - which I added last minute so not pictured (Craft store $5)

Of course you can really add in any small items that you have at home that are the right size to fit inside the eggs and make a variety of sounds. Most of the things I used (except the Easter bunnies/chicks) were things I already had on hand from previous projects.


One of the great things about discovery boxes is they are so freakin' simple to do! Just find a suitable size box/basket/container, gather some items, and throw them inside. Done.

I set the invitation up in the lounge room after Bean went to sleep, so she would find it first thing in the morning...


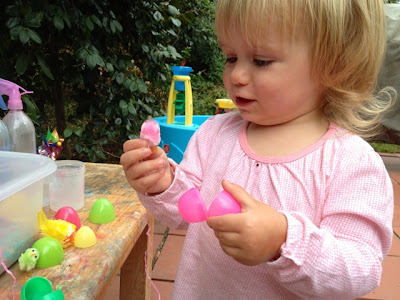
First she went through all the eggs, methodically opening and closing each one (that's my girl!)...


...Then she rummaged through the loose items, most of which she was familiar with - except for the chicks and bunnies! Cue "Ooooo!'s and "Ahhhhh!'s...


...After trying out putting them inside the eggs she gathered them all together on the table and began telling a story...


...after breakfast she revisited the box. Everything got tipped out on the floor, and the business of filling, shaking, and emptying began...


...This is fantatsic for developing hand-eye co-ordination, fine motor skills, sound differentiation, rhythm, and fun!...


...I think this will be gracing our floor for a while!


Happy playing!

B xx